
Wireless Keypad Programming Instructions And Setup Guide
Step By Step Instructions For Programming Overhead Door Wireless Keypads And Access Systems
Wireless Keypad Programming Instructions And Model Overview
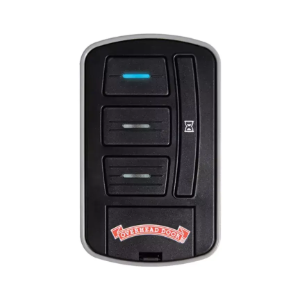
Keypad Programming Models OWK BX And OKP BX
- Wireless Keypad Programming Instructions
- Keypad Programming
- Keypad Model OWK BX and Model OKP BX
Contact your local distributor or call 1 800 887 3667. Just like our garage doors and openers, our support is the best in the business. Some say that our support puts the genuine in our motto, The Genuine. The Original. because we truly care about our customers and do what it takes to make sure you are satisfied with your Overhead Door products. View the wireless programming instructions by selecting your model. Should you need additional information about installing or programming your garage door opener or remote, contact your local distributor or call customer service at 1 800 275 6187.
CodeDodger Keypad Programming For Single And Multiple Doors
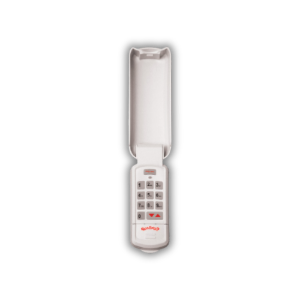
Program Wireless Keypad Model OKP BX With CodeDodger
- Wireless Keypad Model OKP BX with CodeDodger
- Program Keypad for One Garage Door CodeDodger 2
- Create Your Wireless Keypad PIN Personal Identification Number
- On your wireless keypad
- Press in order 3 5 7
- Press the PROGRAM key
- Enter your PIN 3 to 8 characters
- Press the PROGRAM key again
- Close the keypad cover and wait 30 seconds
- Program the Keypad for a Single Door
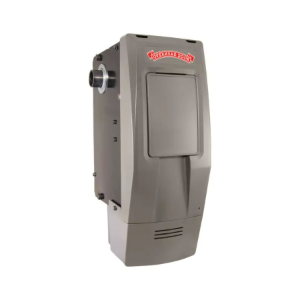
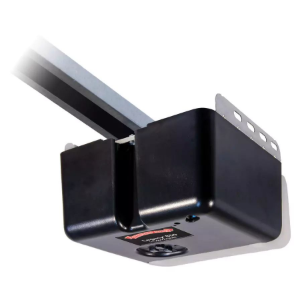
- On the power head
- Press and hold the PROGRAM button until both LED lights turn BLUE
- Release button Only the round LED will remain BLUE
- Press and hold the PROGRAM button again then release The Long LED will blink PURPLE
- Enter your PIN using the keys on the keypad
- Press the UP DOWN button LEDs will stay solid
- Press the UP DOWN button again LEDs will turn off
- Press any key to stop the opener It will automatically stop at the fully open or fully closed position
- The keypad backlight will turn off in approximately 30 seconds
NOTE: If the door does not move check the LED on the keypad If the LED is blinking rapidly the PIN was entered incorrectly After the LED stops blinking re enter your PIN and try again Any keypad button will control the door for 30 seconds after the door starts moving Rapid blinking of the red LED indicates an error After a few seconds the LED will turn off Start over
- Proceed to the Mounting Instructions
- Program Keypad for Multiple Garage Doors CodeDodger 2
- Create Your Wireless Keypad PIN Personal Identification Number
- Press in order 3 5 7
- Press the PROGRAM key
- Enter your PIN 3 to 8 characters
- Press the PROGRAM key again
- Close the keypad cover and wait 30 seconds
- Program the Keypad for Multiple Doors
- All garage door openers will use the same PIN
- On the wireless keypad
- Enter your PIN and press the PROGRAM button
- Press the PROGRAM button again
- Press the number of doors you wish to control 2 or 3
- Press the program button again
- On your garage door opener power head
- Select the first opener and press and hold the PROGRAM SET button until both LED lights turn BLUE
- Release the button Only the round LED will be BLUE
- Press the UP DOWN button again LEDs will turn off
- Press any key to stop the opener It will automatically stop at the fully open or fully closed position
- The keypad backlight will turn off in approximately 30 seconds
NOTE: If the door does not move check the LED on the keypad If the LED is blinking rapidly the PIN was entered incorrectly After the LED stops blinking re enter your PIN and try again Any keypad button will control the door for 30 seconds after the door starts moving Rapid blinking of the red LED indicates an error After a few seconds the LED will turn off Start over
Proceed to the Mounting Instructions
Mounting Instructions And Keypad Configuration Steps
Mount Install And Configure Wireless Keypad System
The keypad must be mounted in sight of the door s at least 5 feet above the ground and clear of any moving door parts Mounting screws are located inside the battery compartment
- Remove the battery cover and batteries
- Drill a 1 16 pilot hold for the tip mounting screw
- Install a screw into the drilled hole leaving a 1 8 gap between the screw head and the wall
- Hook the keypad over the screw
- Mark and drill the pilot hole and fasten the bottom screw
- Install batteries and cover
- Additional Instructions
- Change Your PIN
- Enter your current PIN and press the PROGRAM button
- Enter your NEW PIN and press the PROGRAM button
- Using A Temporary PIN
- A temporary PIN allows temporary access to your home by repair persons meter readers etc
- Enter your current PIN and press the PROGRAM button 3 times
- Enter your temporary PIN and press the PROGRAM button
NOTE Do NOT reprogram the garage door opener s A temporary PIN remains active only until the next time your normal PIN is entered
Forgot Your PIN Resetting Wireless Keypad
- Press and hold the PROGRAM button
- While holding the PROGRAM button press and hold the UP DOWN button for 5 seconds
- Release both buttons You must now start from the beginning and reprogram your wireless keypad
- Changing Battery
- If the keypad backlight does not come on this indicates the need to replace the batteries
- Press in on the front of the battery cover and slide it down off of the keypad
- Remove used batteries and replace them with AAA batteries
- No programming is lost during the replacement of batteries
Model OWK BX Programming And Troubleshooting Steps
Wireless Keypad Model OWK BX Instructions And Setup
Wireless Keypad Model OWK BX Instructions
Testing Garage Door Opener
- Create Your Wireless Keypad PIN Personal Identification Number
- Enter your personal identification number PIN
- Press the button with the arrow up down triangles
- Resetting Clearing Keypad
- Press and hold the PROG button Keep holding and proceed to step two
- Press and hold the 6 button Keep holding and proceed to step three
- Press the key with the arrow up down triangles
- Setting PIN On Keypad
- Press the following keys in order 3 5 7 PROG red LED blinks once per second
- Enter your PIN three to eight characters
- Press the PROG key again the red LED blinks twice per second and turns off
Getting Started
Before you begin be aware of the following For convenience program your keypad before mounting If programming your garage door opener is disrupted at any point due to program failure clear reset your keypad Then start over Locate the Learn Code button and the Learn Code red LED indicator
Programming One Garage Door Opener
- Press the Learn Code button once red LED indicator will blink
- Enter your PIN
- Press the button with the arrow up down triangles The Learn Code indicator LED will stay on
- Press the button with the arrow up down triangles a second time The Learn Code indicator LED will turn off
- Press the button with the arrow up down triangles a third time Garage door should now move
- Programming Two Or Three Garage Door Openers
- All garage door openers will use the same PIN
- Programming The Wireless Keypad
- Enter your PIN and press the PROG button red LED blinks once per second
- Press the PROG button a second time red LED blinks twice per second
- Press the total number of doors you wish to control either 2 or 3
- Press the PROG button a third time the red LED blinks several times and turns off
- Programming Garage Door Opener
- Decide which door will be Door 1 2 and 3 Learn Code indicator LED on opener blinks
- Enter your PIN and press the arrow up down triangle button Learn Code indicator LED continues to blink
- Press the number you have picked for this door opener 1 2 or 3 Learn Code indicator LED stays on
- Press the arrow up down triangle button a second time Learn Code indicator LED turns off
- Press the arrow up down triangle button a third time The garage door should move
- Repeat steps one through five to program each garage door opener Each door opener must be programmed to receive the signal from the wireless keypad
- Troubleshooting Tips
- If the garage door does not move check the red LED on the keypad
- If the LED blinks rapidly the PIN was entered incorrectly
- Any keypad button will control the door for 30 seconds after the door starts moving
- Rapid blinking of the LED indicates an error After a few seconds the LED will turn off and you can retry
- If the red LED does not blink during use the battery needs to be changed
Mounting Instructions
- Remove the battery cover
- Drill a 1 16 hole for the top mounting screw
- Install a screw into the top drilled hole leaving a 1 8 gap between the screw head and the wall
- Hook the keypad over the screw
- Mark the bottom hole then screw in the bottom screw
- Reinstall the battery cover
Additional Assistance
Should you need additional information about installing or programming your garage door opener or remote please call customer service at 1 800 275 6187 or use our distributor locator to find a Red Ribbon Distributor near you
Trusted Keypad Programming Support
Homeowners Trust Proven Wireless Keypad Setup And Programming Guidance
We’d love to hear about your experience with us! Your feedback not only helps us continue improving, but it also helps others feel confident in choosing our services. If we’ve made a positive impact, we’d truly appreciate you taking a moment to share your thoughts. Your review means a great deal to our team and plays an important role in supporting our business. Thank you for helping us grow!